Monday, May 16, 2016

Wheels in Motion

It seemed natural to include wheels and cars in our exploration of how things move...
Painting with Cars

Painting with Cars on a Ramp

Foaming Car Wash
This sensory bin started out with shaving cream, then we added baking soda, then we squirted vinegar and watched it bubble and foam. We ended with soap and water to rinse everything off. 
(Totally inspired by Fun at Home with Kids!)

Saturday, May 14, 2016

Can You Build a Bridge?

A young engineer at work...

This student tried several different designs for a bridge to see if he could increase the number of manipulatives that fit without toppling it over.

Such a fun process to watch. :)

He created a very stable structure in the end!

Thursday, May 12, 2016

Seed Growing Experiment

Back in April we planted some seeds for a seed growing experiment. We put some seeds in bags with moist cotton balls and some in cups of dirt. Then we placed them in windowsills that face the same direction so they would get about the same amount of light.

Then we made predictions about which seeds would grow the fastest. Most of the kids were skeptical that the seeds in the bags would even grow at all. In the end, I was the only one who guessed that the bag seeds would grow first, and all of the kids picked the cup seeds.

And they were right! The seeds in the cup sprouted first.

A little while later we noticed some sprouts in the bag seeds as well. We've been watching them grow all month, and today we took some time to document the results of our experiment.

First of all, not all of our seeds sprouted. One of the cups didn't sprout, and two of the bags didn't either. We don't know why the cup seed didn't sprout, but we hypothesized that the bag ones didn't because they had too much water. The seeds in those bags were moldy and very wet.
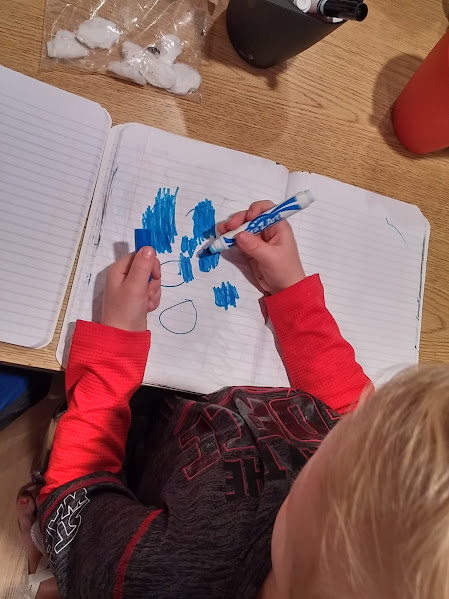
Writing about how the cotton balls were too wet for the seeds to grow in this bag.
One student chose to put lots of seeds in her bag, and it was cool to see all of the successful sunflower sprouts.


Another student had a couple long, little sprouts.


In the end, the plants in the cup got much bigger and looked healthier than the sprouts in the bag. Although many seeds were able to sprout in the cup, it was clear the bag was limiting their growth long term.

As a side note, the seeds that we used came from the sunflowers and pumpkins that we harvested in the fall! I planted some extra pumpkin seeds to make sure each student could take one home to keep growing. What a fun way to bring the year full circle.

Tuesday, May 10, 2016

Exploring Motion

Here are a few of the ways we've been exploring how things move.

Magnetic Marble Tubes
Best use of paper towel rolls I've found yet...the kids have loved this.

Ramps
We've tried out some different materials to make ramps, including train tracks, blocks, cardboard pieces and a vinyl rain gutter. We've used the ramps to observe how items move- do they slide? roll? get stuck? Do they stay on the ramp? Do they go down in a straight line? 

Wind and Blowing
We also tried moving things by blowing, like the wind. This was a blowing pom-pom game that we played. It was harder than it looked to control the movement of the pom-pom.


Then the kids came up with this blowing game all on their own. They called it "Wind Bowling." They arranged the pins in different ways, and tried to blow them down with only their breath.

Friday, May 6, 2016

Math Bags: I Spy

After bringing items in our Math Bags throughout the year, we finished the project with a math celebration. We've been using the items every week to count, sort, make patterns and graphs, but for our celebration we used them for some "I Spy" activities.

We read I Spy Numbers to practice our spying skills...

Many of our items were set out at the table so the kids could make their own "I Spy" board.

Then we made I Spy bags using rice and ziploc bags. 
Everyone picked items from our collection to place inside.


Wednesday, May 4, 2016

Ladybugs Up Close

After the kids took their ladybugs home, there were still a few left that hadn't emerged from their pupa state. My family and I enjoyed observing the last few ladybugs before setting them free. We were even able to get some fun, up-close pictures thanks to a macro lens!


My toddler has been really excited about the ladybugs, but was nervous to hold or get too close to them.

After a few minutes though he warmed up and was ready to take a closer look.


Monday, May 2, 2016

Ladybug Habitats

Timing worked out for us last week, and the kids were able to observe our ladybugs in a pupa state on one day
 and then as adult ladybugs the next!

I wanted the kids to have some extra time observing their new ladybug friends before they were set free, so we created ladybug habitats so each student could take one home. 

The kids carefully selected the materials they thought their ladybug might like, and then we put a raisin inside each one for the bugs to eat. 
Before putting the ladybugs inside, everyone got a chance to hold one and look at it up close. 
Some kids were nervous to hold it in their hands, but others let the ladybug crawl all over them!

Afterward we drew our ladybugs in our journals.
It was an exciting week!

Related Posts Plugin for WordPress, Blogger...